
Update an event
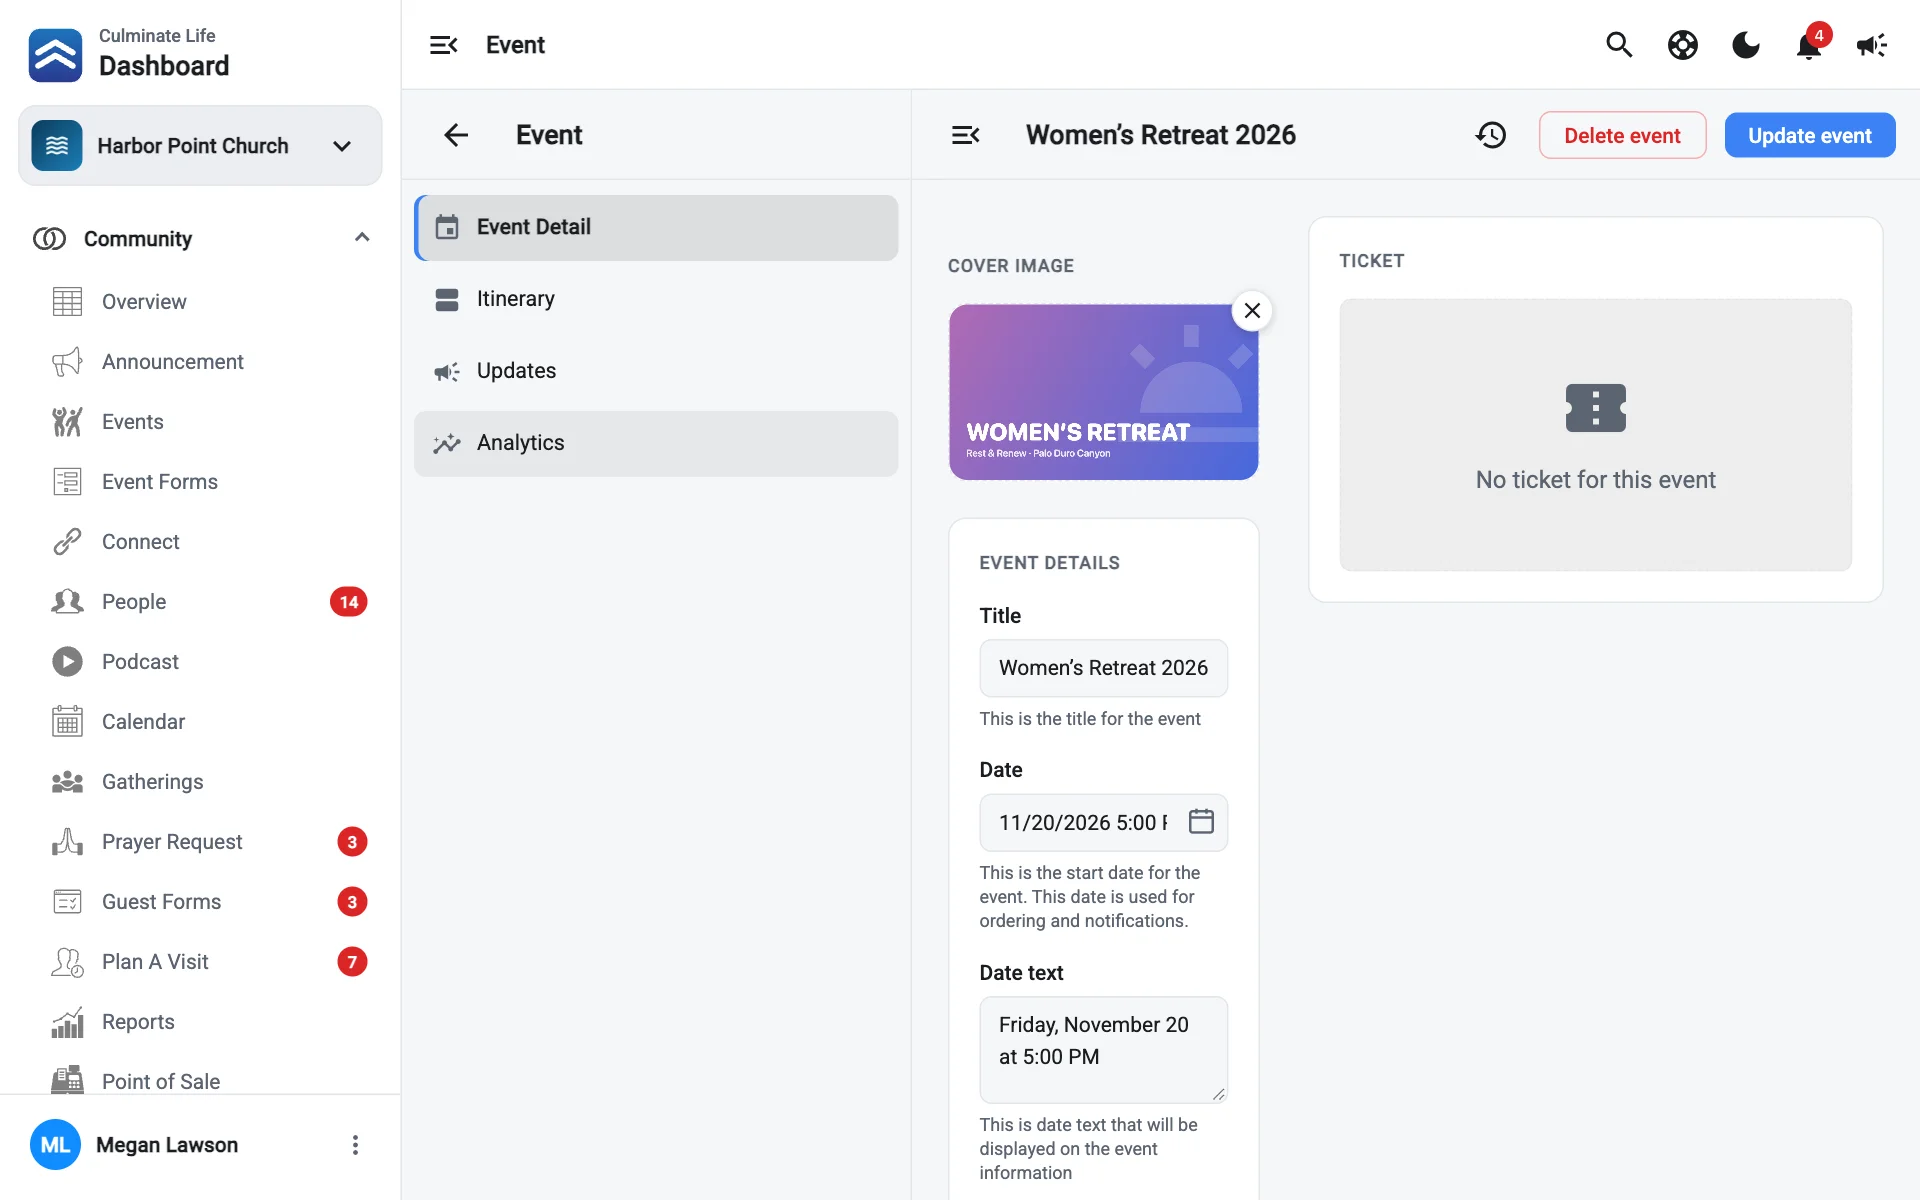
Go to Community → Events and select the event. The event page has four sections in its menu: Event Detail, Itinerary, Updates, and Analytics.
Event detail
Change anything you set when you created the event:
- Cover image, Title, Date, Date text, and Details.
- Connects associated with.
- Files: Add file, or remove one with its ×.
- Calendar: Add calendar entry, select an entry to edit it, or remove it.
- Where: on or off campus. Rooms are booked for each calendar entry when you save.
- Ticket end date and Capacity, if the event has a ticket. Lowering capacity below the number of tickets already taken marks the event sold out; existing tickets stay.
When you’re done, select Update event.
Below the details you can see the event’s Ticket, Ticket Criteria, and Payment (with its options and discounts). These can’t be edited here.
Itinerary and updates
Add sessions and speakers, or post an update to everyone coming. See Itinerary and updates.
Analytics
How the event is doing in the app and on your website:
- Views and people in the date range, compared with the range before.
- How people got here, like from a notification, a link, or browsing.
- Platforms: iOS, Android, or web.
- Funnel: how many people viewed, started, and got a ticket, and how many came from a notification.
- Notifications sent about it, with push and email opens.
Some numbers include people who aren’t signed in. Lists of people only include signed-in people. Select Message these people to notify a list.
For tickets, payments, and RSVPs, use the Tickets, Payments, and People Going tabs.
History
Select History to see every change made to the event, who made it, and when.
Delete an event
Select Delete event. The event is archived so you can look back at it later; it moves to Archived on the Events page.