Event Payments
Learn about managing payments for your events and private events.

Managing Payments
Here you are able to mange all of your event payments and private payments. You can create a payment, and update a payment. You can also see all of the payments that have been made for your events, along with who still needs to pay for the event.
Payments
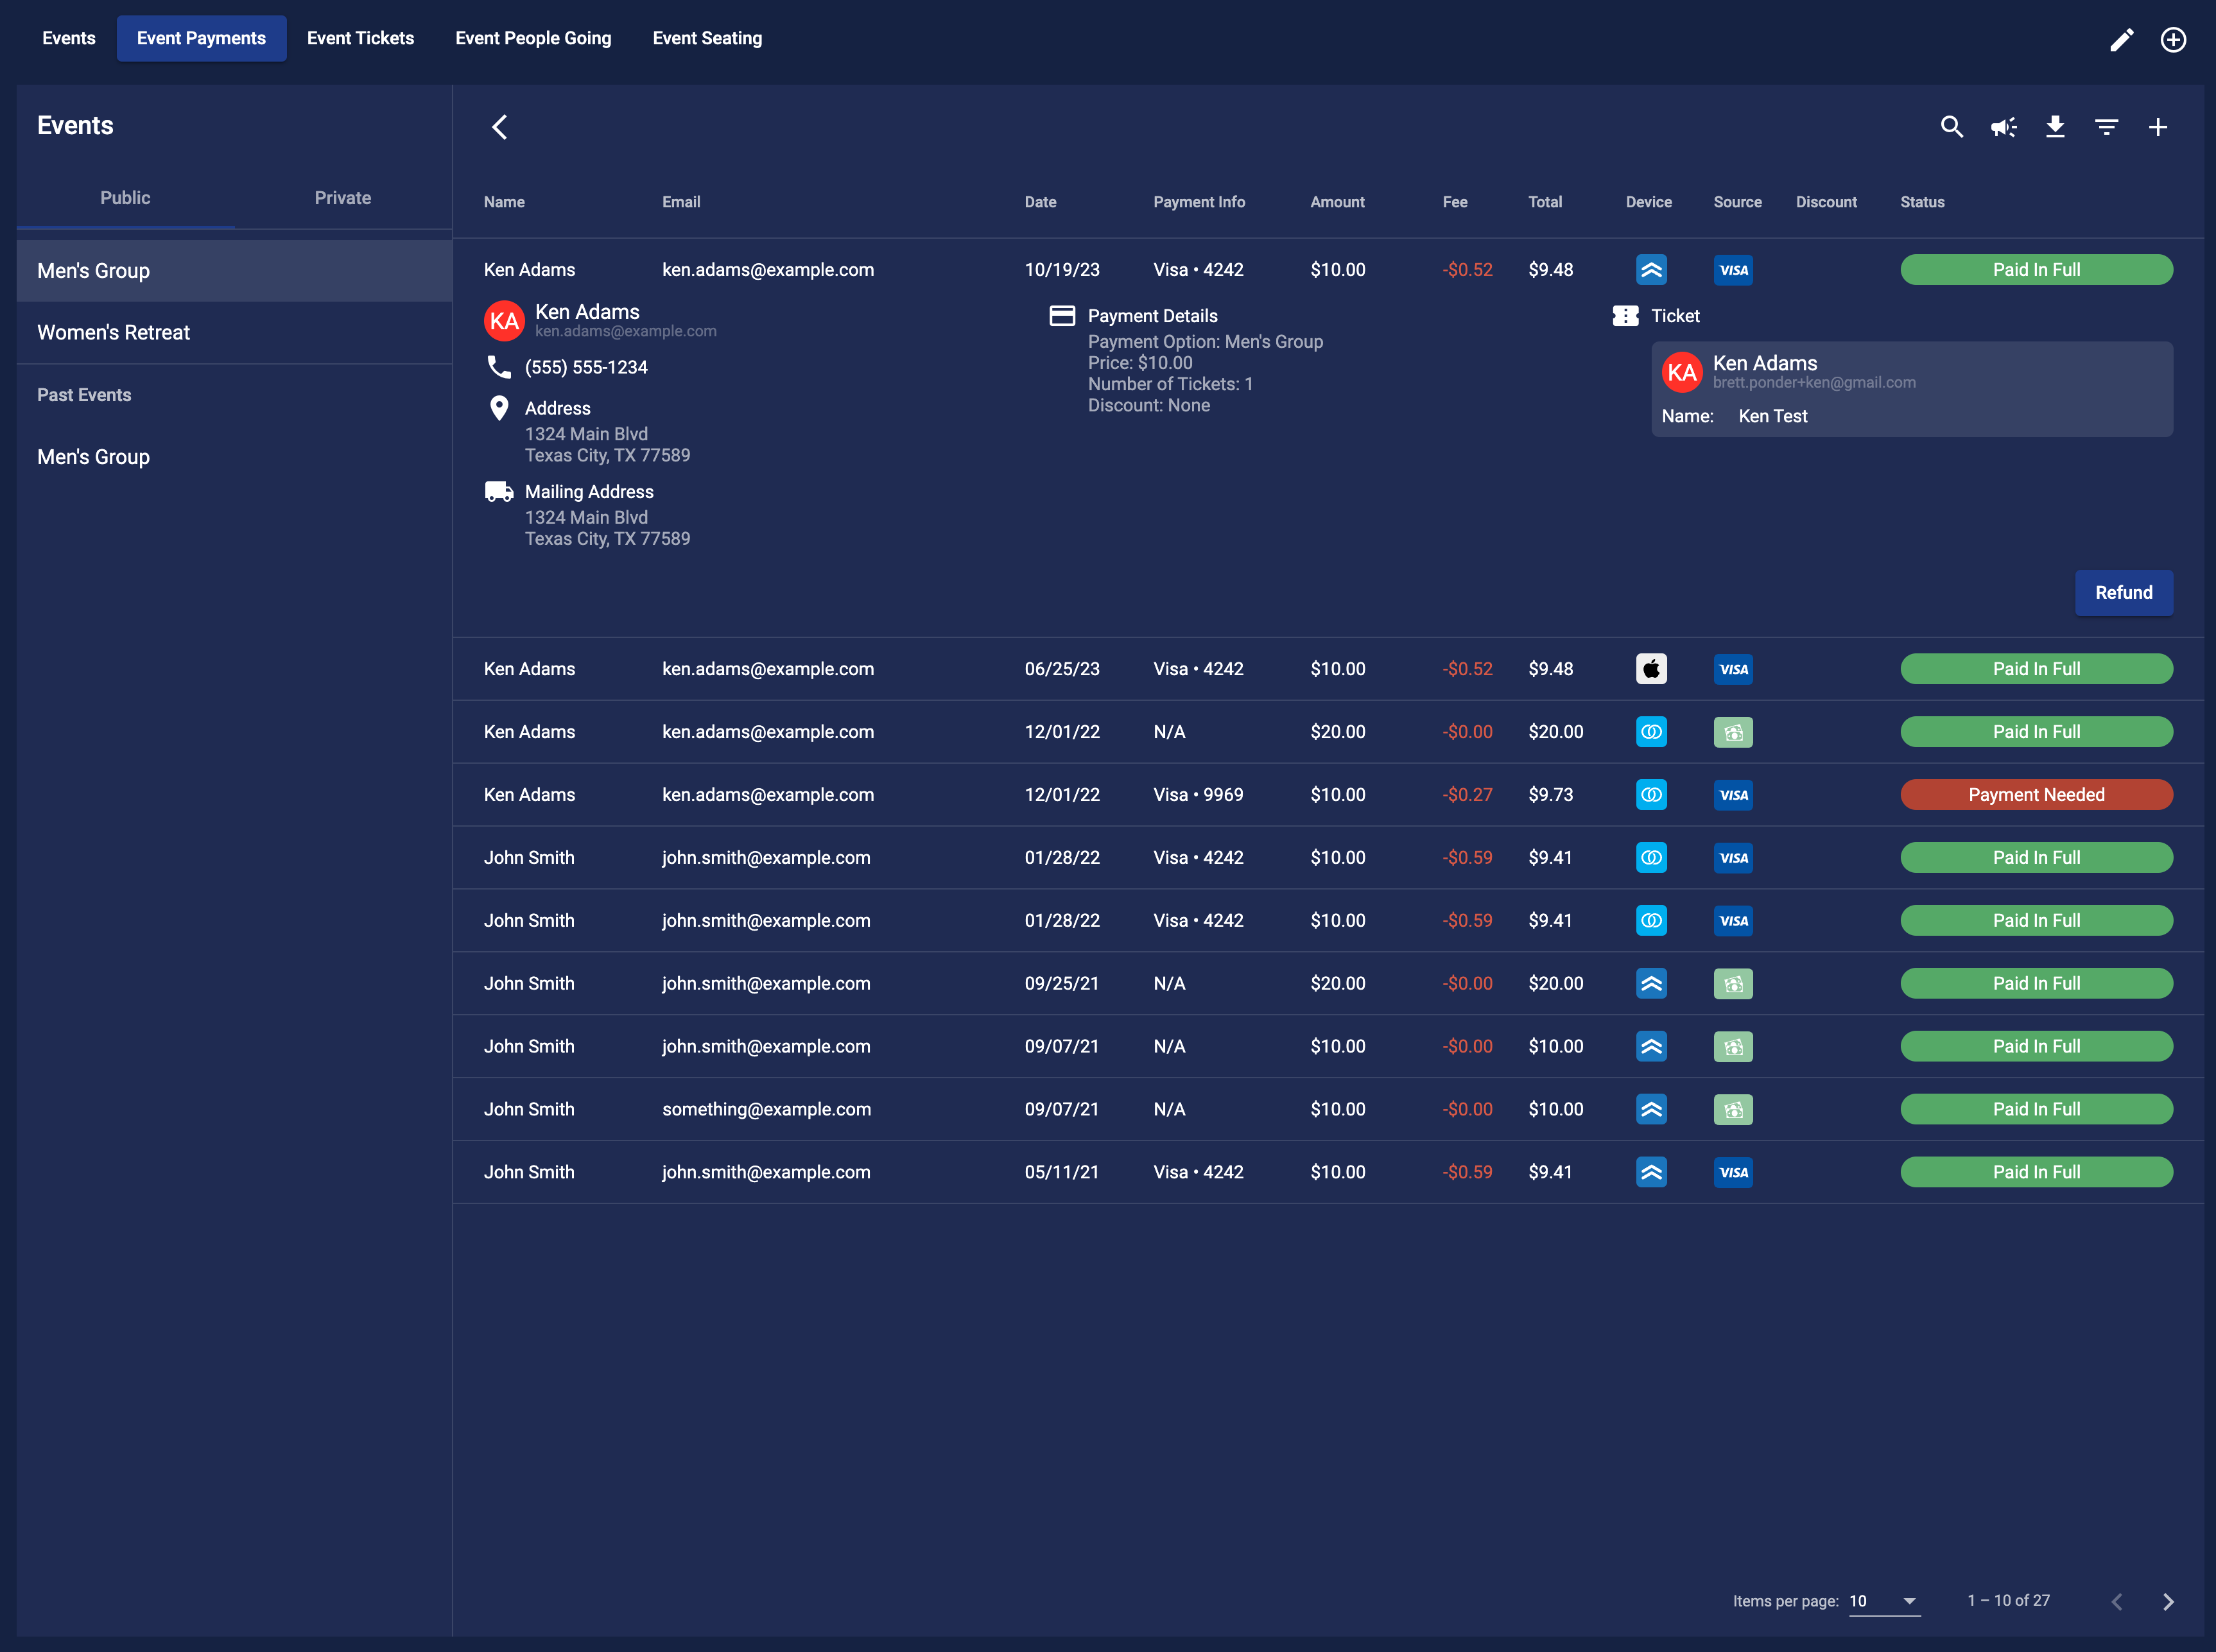
Here you can see all of the payments that have been made for your events. You can see the following information:
- Name
- Date
- Payment Information
- Amount: This is the amount that was paid.
- Fee: This is the processing fee for the payments.
- Total: This is the total amount that will be paid out.
- Device: This can be Web, Android, iOS, Community Portal, or Dashboard.
- Source: This can be Card, Check, or Cash.
- Discount: If a discount was used it will be displayed here.
- Status: This can be Paid in Full, Payment Needed, or Refunded.
Click on a payment to see more information about the payment. You will see more information about the person and other information linked to the payment like the event form that was completed or the event ticket.
If you need to refund a payment click on the Refund button. You can also see the payment information and the payment history to help with the refund process.
For payments with a status of Payment Needed you can notify the person that payment is still needed. Click on the Notify button to send an email to the person. You can also make a payment for the person by clicking on the Make Payment button.
Sorting, Filtering, and Searching
When you hover over a column in the table you will see an arrow appear. Click on the arrow to sort the column in ascending or descending order. Click on the arrow again to change the order.
To filter the table click on the filter icon in the top right corner of the table. Here you can filter the table by the following:
- Device
- Source
- Discount
- Status
To search the table click on the search icon in the top right corner of the table. You can just start typing in the search bar to search the table. A search is done on people information. This includes the name, email, phone number, date of birth and address.
Notification
If you need to send a notification to the people that have made a payment, you can do so by clicking on the notify icon in the top right of the table. To learn more about the notification you can go to the Notification guide.
Download Payments
If you need to download the payments you can do so by clicking on the download icon in the top right of the table. This will generate a CSV file of all the payments to be downloaded.
Refund Payment
If you need to refund a payment you can do so by clicking on the Refund button on the payment that you have selected. This will open a modal where you can enter the amount that you want to refund. You can also select a reason and add a note for the refund. Once you have entered the information click on the Refund button to refund the payment.
Make Payment
Making a payment in the dashboard is easy. All you need to do is click on the Make Payment button on the payment that you have selected. This will open a modal where you can make the remaining balance payment with cash or card.
Add Payment
If you need to add a payment for a person you can do so by clicking on the plus icon + in the top right of the table. This will open a modal where you can enter the number of tickets and a discount code and select the person the payment is for. Once you have entered the information click on the Cash or Credit Card button to finish adding the payment.
Private Payments

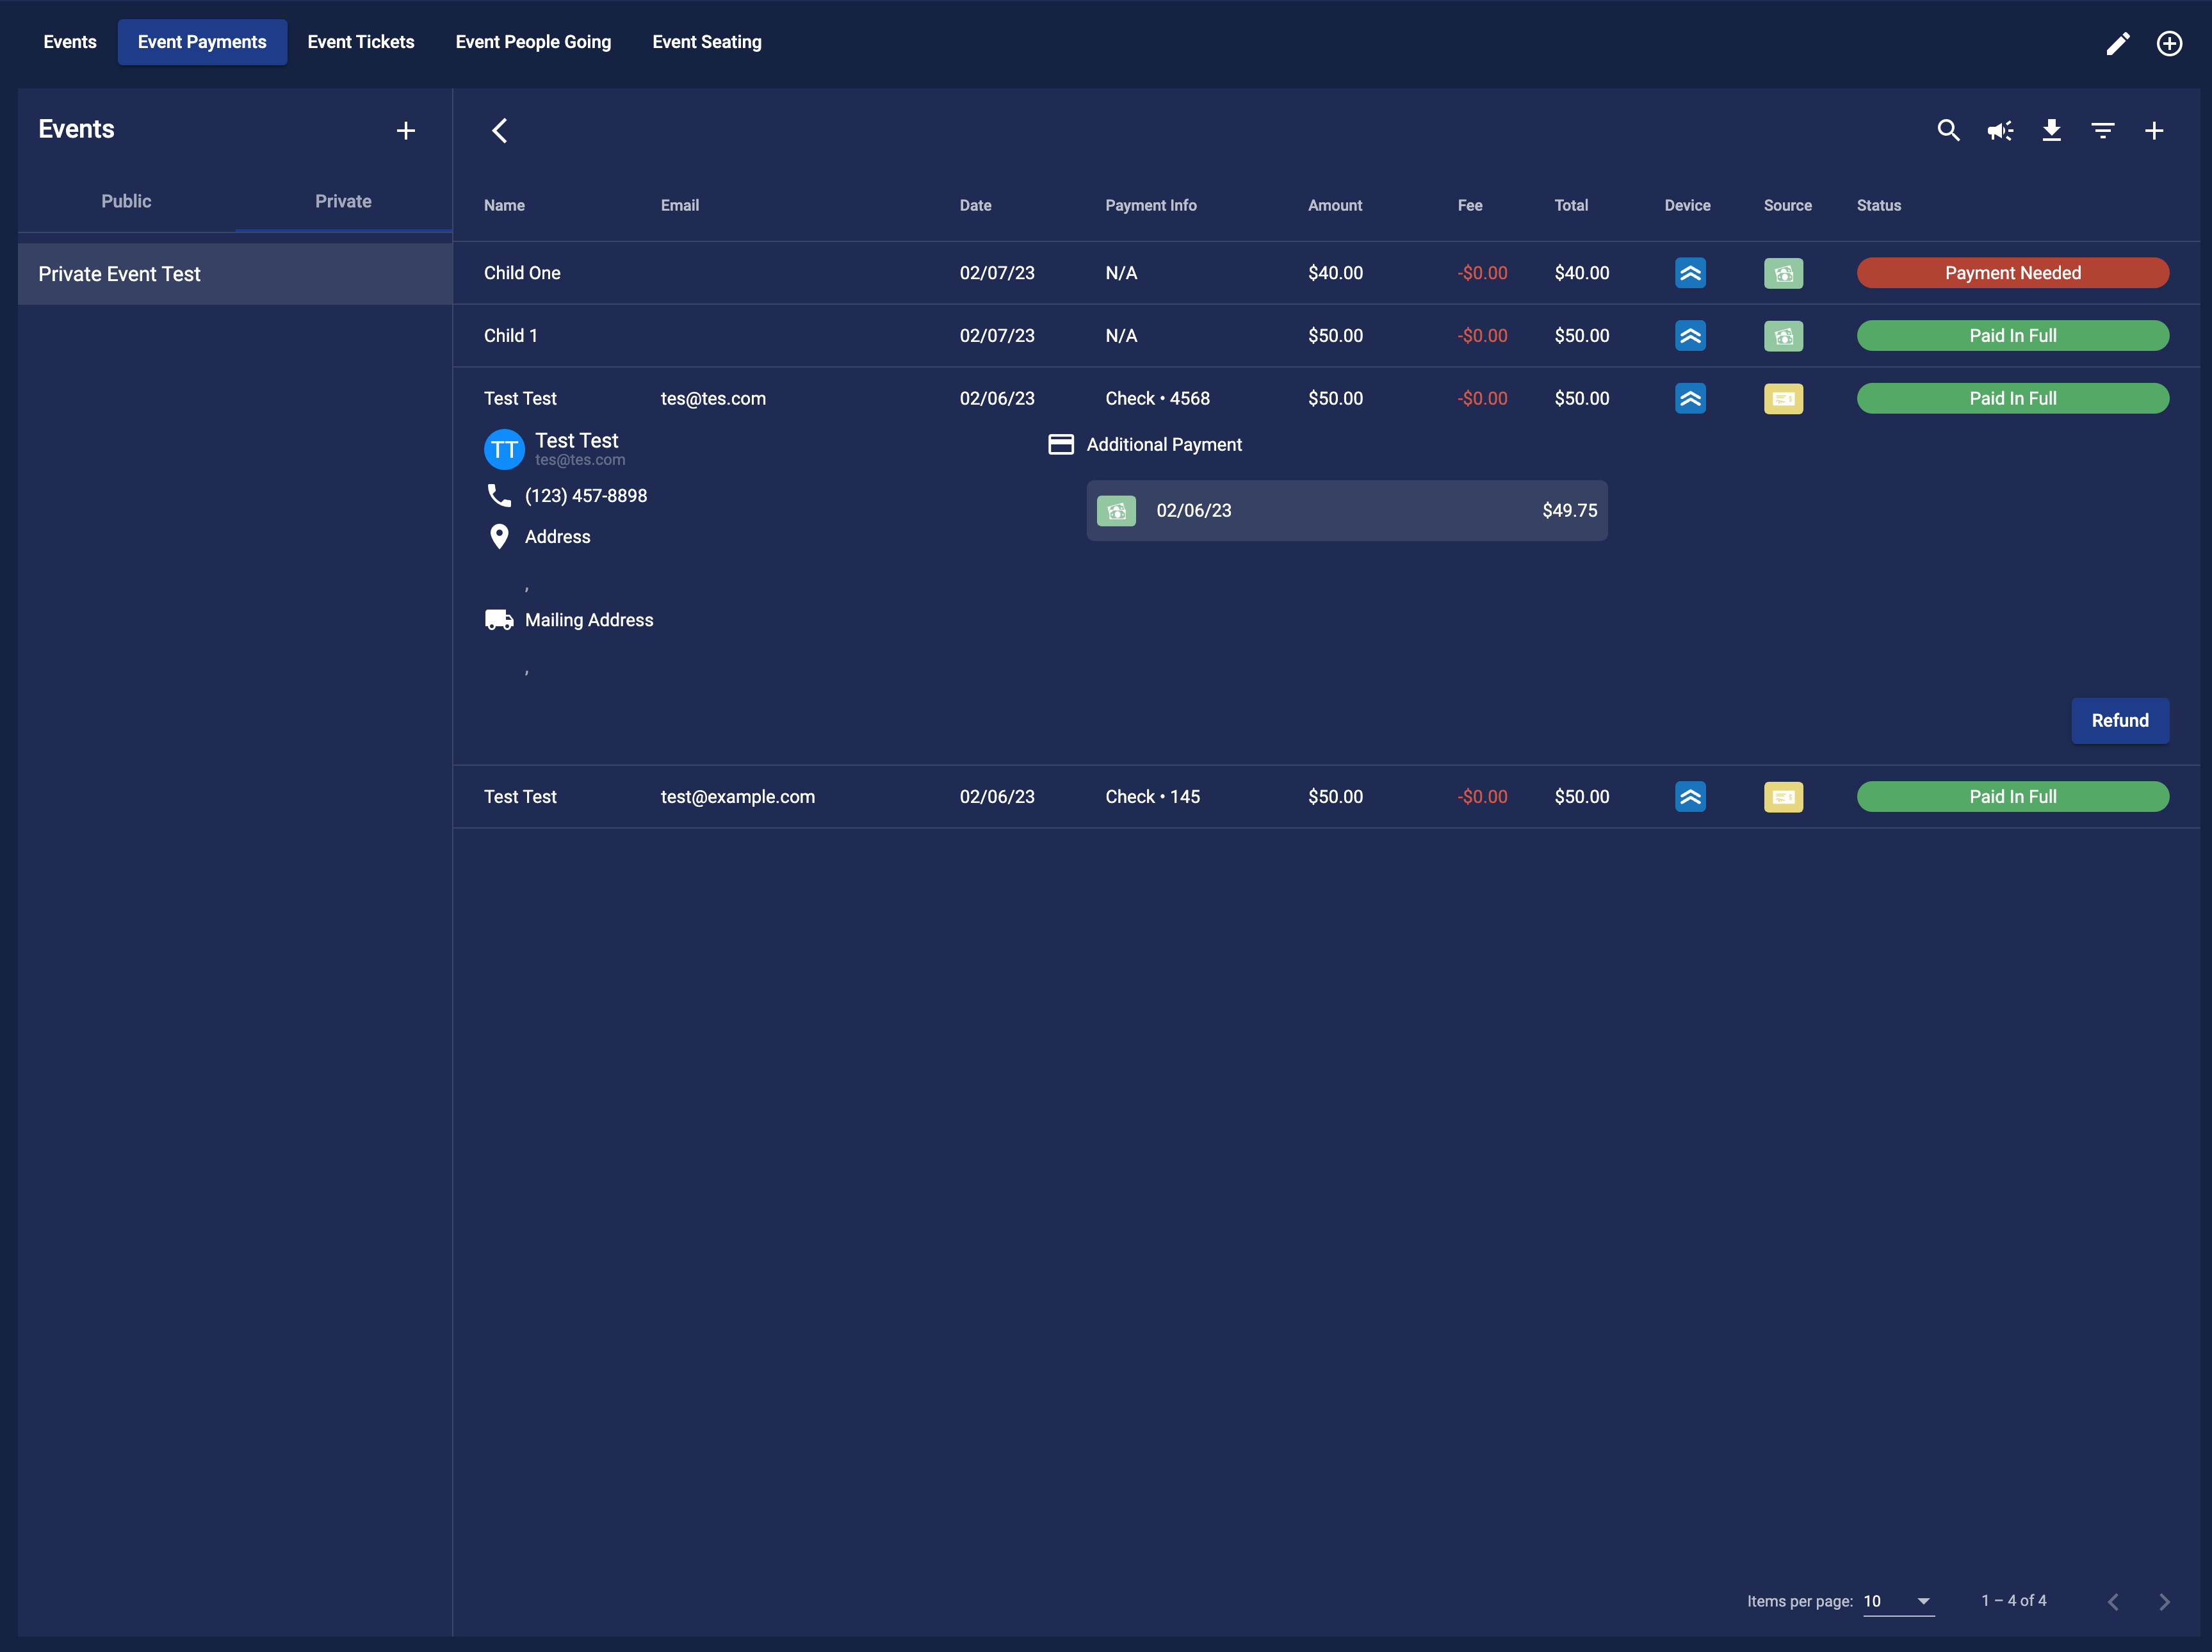
Private Payments are for activities or events that you just need to collect money for. You get all of the same information tracked as event payments minus discounts. To start click on the add icon + in the top right corner of the events column on the left. This will open a modal where you can enter the title for the event. Click Create and now you will be able to add payments for the event.
Add a Payment
To add a payment click on the plus icon + in the top right corner of the table view. This will open a modal where you can enter the following information:
- Payment Type: This can be Cash or Check
- Person: Select the person that you want to add the payment for.
- Amount: This is the amount that was paid.
- Check Number: If the payment type is check you can enter the check number here (not required).
- Paid in Full: Toggle whether the payment is paid in full or not.
When you are done click the Add button to add the payment. You can also click the Cancel button to cancel the payment. Once you click Add the payment will be added to the table.
Make a Payment
If you need to make a payment for a person you can do so by clicking on the Make Payment button on the payment that you have selected. This will open a modal where you can make the remaining balance payment with cash or check. You can also enter the check number if the payment type is check. Once you have entered the amount and or check number you can click the Add button or Add and Mark Paid in Full. If you click the Add button the payment will be added to the main payment as an additional payment. If you click the Add and Mark Paid in Full button the payment will be added to the main payment and the main payment will be marked as paid in full. You can also click the Cancel button to cancel the payment.
Refund Payment
If you need to mark a payment as refunded you can do so by clicking on the Refund button on the payment that you have selected.
Mark Paid in Full button.