Create Payment
How to create the right payment for your event.
Creating a Payment for an Event
Creating an efficient payment system for events is crucial for any organization. This guide will walk you through the process of setting up a payment for an event using Culminate Life's platform, ensuring a smooth transaction process for your members.
Getting Started
Navigate to the Event Payments tab under Events in the Community section of the dashboard. Click the plus icon in a circle (+) to create a new payment for an event.
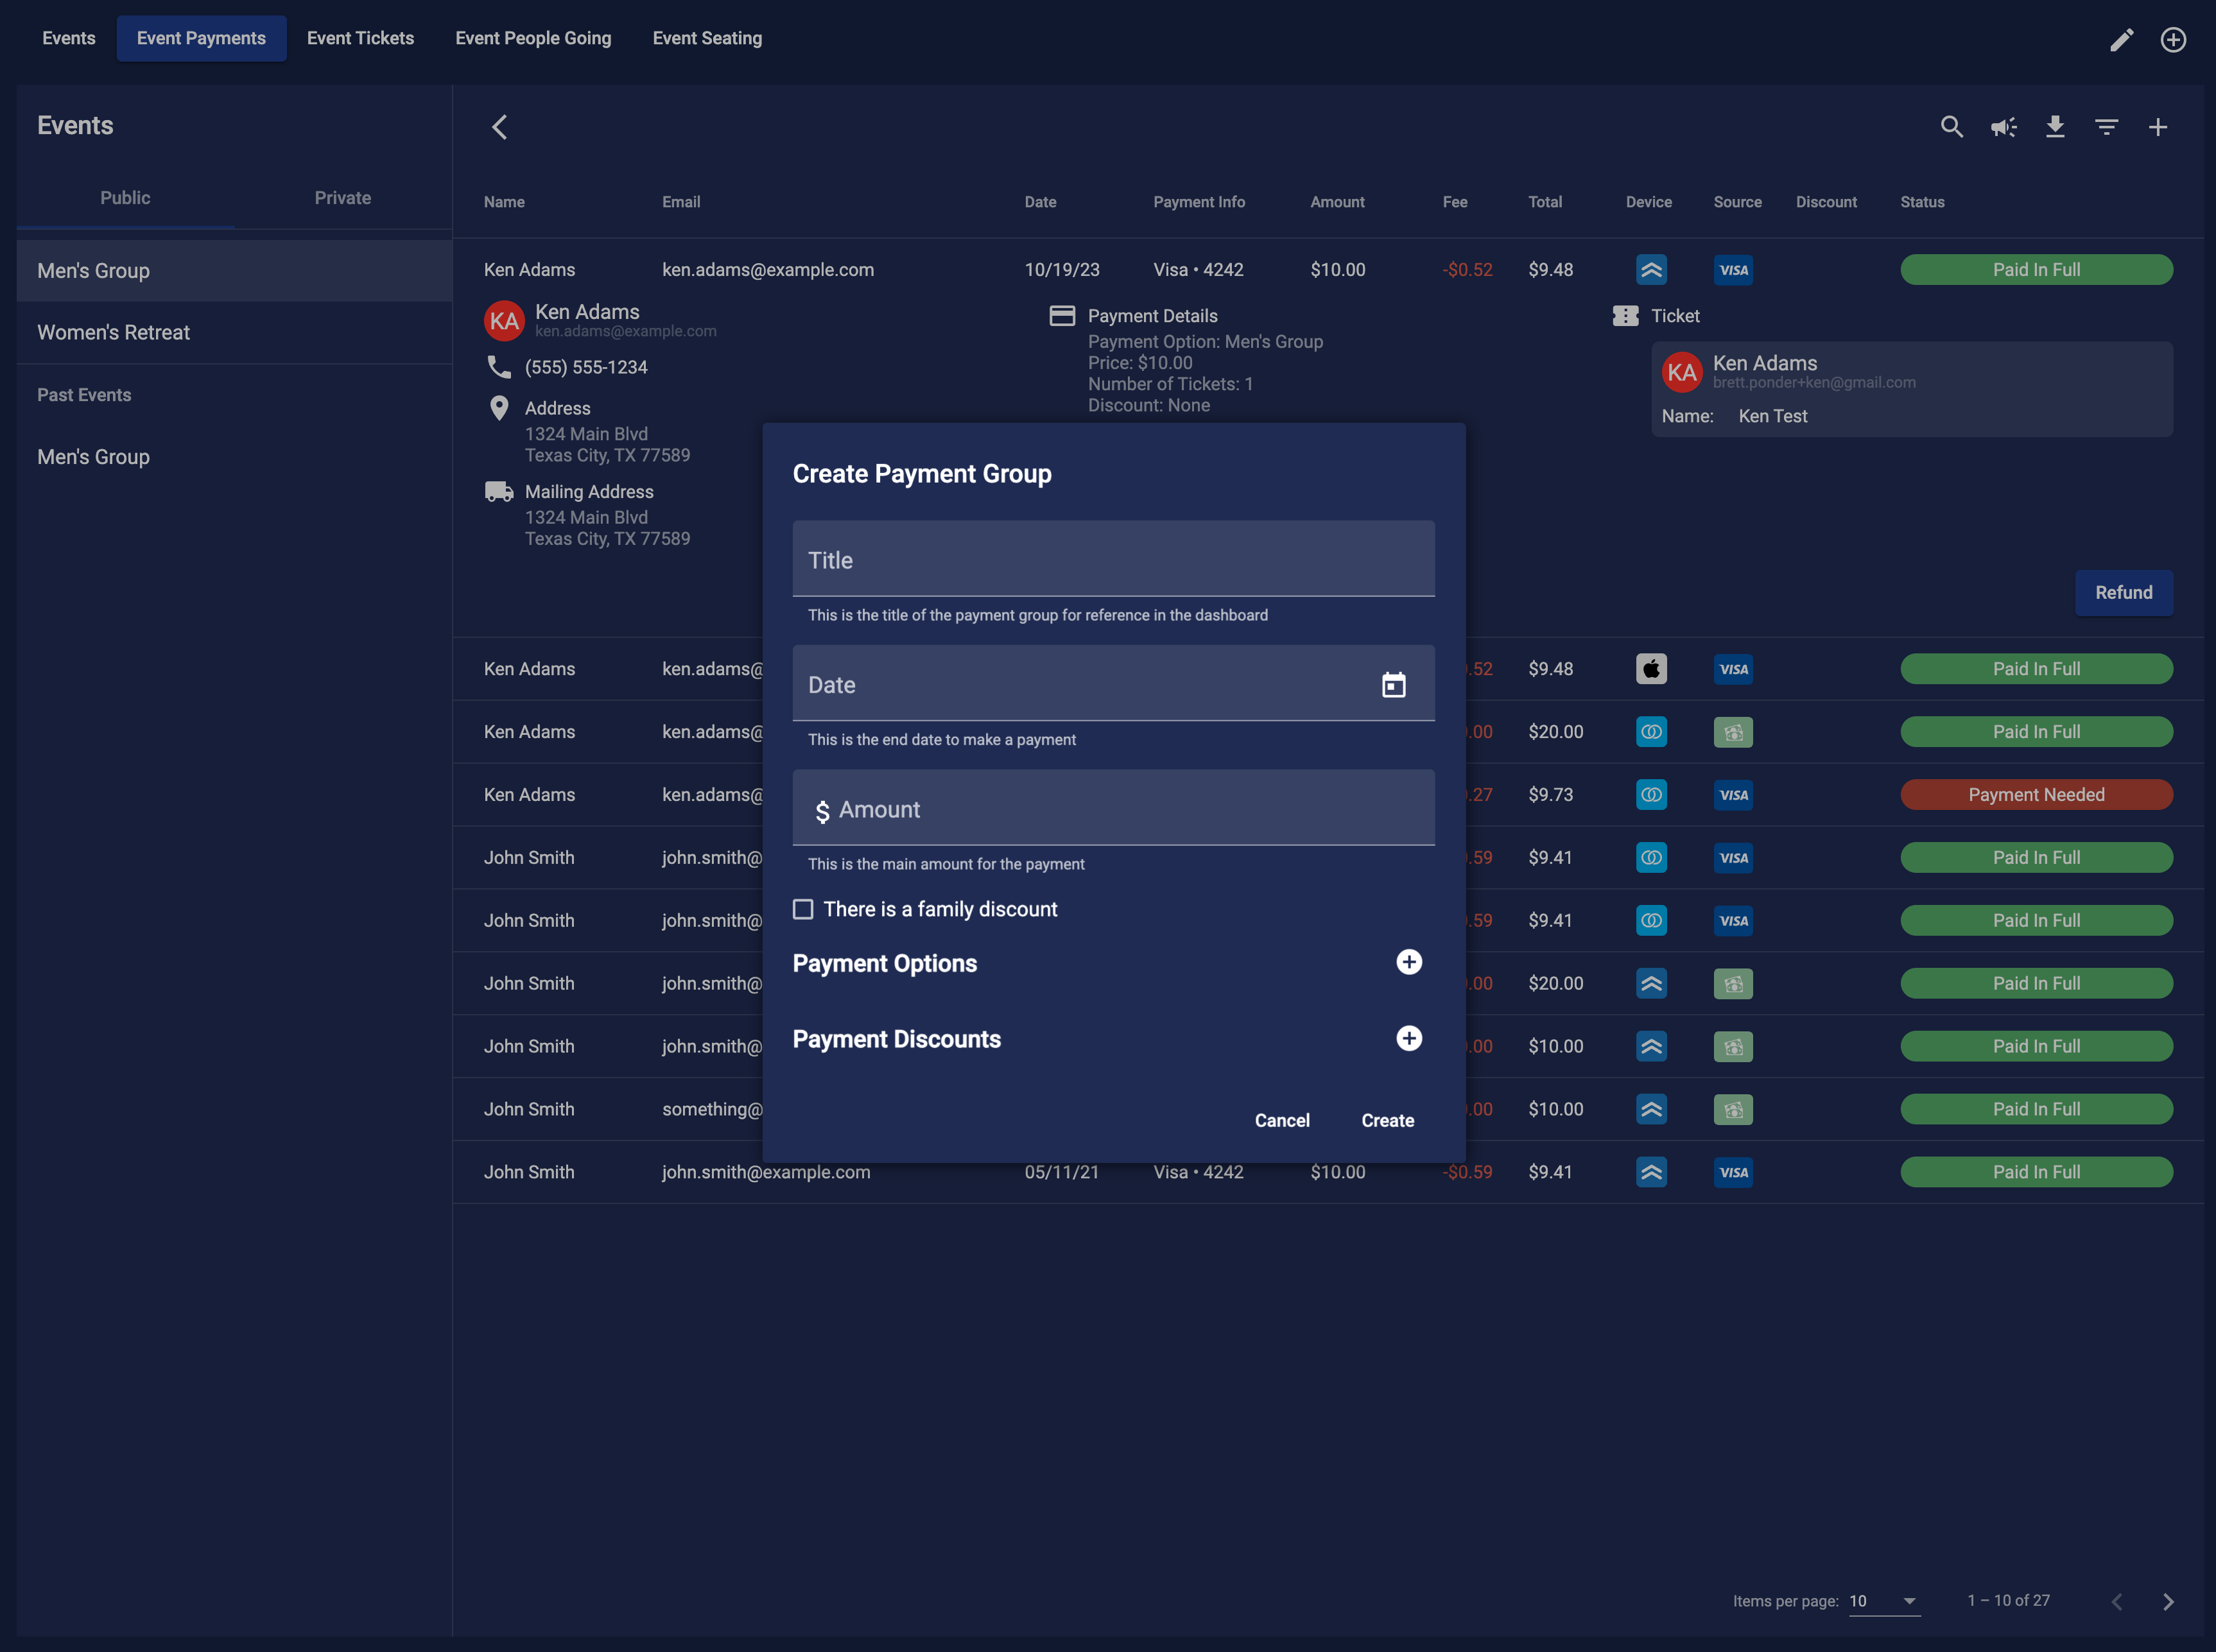
Defining the Payment Group
In the "Create Payment Group" modal, fill out the necessary fields:
- Title: Give your payment group a distinct name. this is only visible in the dashboard.
- Date: Set the final date and time for ticket purchases using the calendar and clock menu.
- Amount: Enter the total cost of the event ticket. This is the default price for the event.
Adding Payment Options
Payment options allow you to set up different payment structures for your event. This gives you the flexibility to offer discounts, deposits, and installment payments. To add a payment option click on the + icon next to Payment Options. In the Create Payment Option modal, fill out the necessary fields:
- Title: Enter a title for the payment option. Invisible to you only in the dashboard.
- Date: Set the final date and time for the payment option.
- Amount: The total cost for the payment option.
This is all you need for a payment option. Click Add to save this option. There are two other option for structuring your payment option:
- Deposit: Payment that need to have a deposit made.
- Installment: Payment that need to be made in multiple payments.
Once you add the payment option you click on the option to edit it or click the X button to remove it.
Deposit Option
For high-value tickets or where you need people to reserve a spot, you might want to require a deposit:
- Check the
Payment Option has a depositbox. - Enter the deposit amount.
Click Add to save this option.
Installment Option
To set up installment payments:
- Check the
Payment Option uses installmentsbox. - Click the plus icon
+next to Payment Installments.
In the Create Payment Installment modal, fill out the necessary fields:
- Title: Enter a title for the installment.
- Date: Set the date and time for the installment payment needs to be made.
- Amount: Enter the amount of the installment.
Click Add to save this installment. Repeat these steps for each installment you want to set up. Once you have added all the installments, click Add to save the payment option.
Setting Up Payment Discounts
We offer two types of discounts: family discounts and discount codes.
Family Discounts
To offer a family discount:
- Check the
There is a family discountbox. - Specify the discount amount or percentage.
- The system will apply this discount to members' family units automatically.
Discount Codes
To offer discounts click the plus icon + next to Payment Discounts. In the Create Payment Discount modal, fill out the necessary fields:
- Title: Provide a title for the discount.
- Code: Enter a unique code for the discount (e.g., VOL15 for a 15% volunteer discount).
Select the discount type (amount or percentage) and enter the value for discount. Then click Create to add the discount. You can add as many discounts as you need.
Finalizing the Payment Setup
Once all options and discounts are configured, click Create to save your payment setup. You can edit the payment settings at any time. Learn how to update your payment settings in the Update Event Payment guide.
Completing the Event Setup
If your event requires a registration form, proceed to create one Create Event Form. Otherwise, you're now ready to start creating your event with the configured payment settings. Create an Event and attach these payment settings to it. Congratulations! You've successfully set up a payment for your event.
Example
Here's an example of a payment setup for an event. This event has a total cost of $250. The event will be held in two months. This payment has a early bird special for $200 that is available for month from today. The early bird special has a deposit of $50 and the rest is due at the event. There is also a discount code for 15% off for volunteers. The discount code is VOL15.
How to set this payment up? In the Create Payment Group modal, complete these steps:
- Enter the title for the payment group.
- Set the date for the last day to purchase tickets. Which would be two months from now.
- Enter the amount for the ticket. For this event would be $250.
- Click the plus icon
+next to Payment Options. - In the Create Payment Option modal, enter the title and date for the early bird special, The date would be one month from now. The amount would be $200.
- Check the
Payment Option has a depositbox and enter the amount for the deposit. The deposit would be $50. - Click
Addto save the payment option. - Click the plus icon
+next to Payment Discounts. - In the Create Payment Discount modal, enter the title and code for the discount. The title would be Volunteer and the code would be VOL15. Select the type
Percent amountand enter the value for the discount, which would be 15. - Click
Createto save the discount. - Click
Createto save the payment setup.
Now your payment is ready for use. You can now create your event and attach this payment to it.
For the user, they will be able to pay just the deposit for the early bird special and then pay the rest at the event or they can pay the full amount for the early bird special. Once the date has past for the early bird special the user will only be able to pay the full amount for the event, which would be $250. If the user has the discount code they can apply it at the time of purchase for any option.