Create Form
Learn how to craft the best form for your event.
Creating an Event Registration Form
In this guide, we'll walk through how to create a form in Culminate Life. Forms facilitate event registration, ranging from simple to detailed information collection. Before diving in, it's prudent to plan out the necessary information and consider the optimal field layout. Referring to previously used printed forms can serve as a beneficial guide during digital form creation.
Understanding Fields
Fields define the input areas for members. Depending on your requirements, there's a variety of field types:
Available Field Types
Types
| Type | Description |
|---|---|
Name Field | Reserved for the registrant's first and last name. |
| Field | Suitable for short answers. |
| Side By Side Field | Designed for related data, e.g., First Name and Last Name. |
| Field Area | Ideal for longer answers. |
| Date Field | Provides a date picker for users. |
Name Field is required for all forms.For an effective form, customization is key. Fields can be set as 'Required' to prevent form submission without specific data. Additionally, determining data types for fields ensures data validity prior to submission.
Keyboard Types
Types
| Type | Description |
|---|---|
| Text | Presents a standard QWERTY keyboard. |
| Validates email formats. | |
| Capitalize Sentence | Auto-capitalizes each sentence's initial word. |
| Capitalize All Words | Auto-capitalizes every word. |
| Capitalize Characters | Auto-capitalizes each letter, useful for state abbreviations. |
| Number | Offers a numeric keyboard |
| Phone Number | Generates a ten-key keyboard with only number keys and automatically formats the data entered into a ten-digit phone number format |
Incorporating Selections
For clear choices, you can employ two main selection types:
Types
| Type | Description |
|---|---|
| Selection | Limits choices to two. |
| Selection Group | Allows for more than two choices. |
Form Organization
Form structuring enhances user comprehension and streamlines dashboard data viewing. Using section features provides this structure:
Section Types
Types
| Type | Description |
|---|---|
| Section | Denoted with a bold title. |
| Subsection | Features a smaller title. |
| Section Description | Combines a bold title with a description area. |
For lengthy forms, it's efficient to partition them across multiple pages. To do this, use the "+" button located at the form's bottom right.
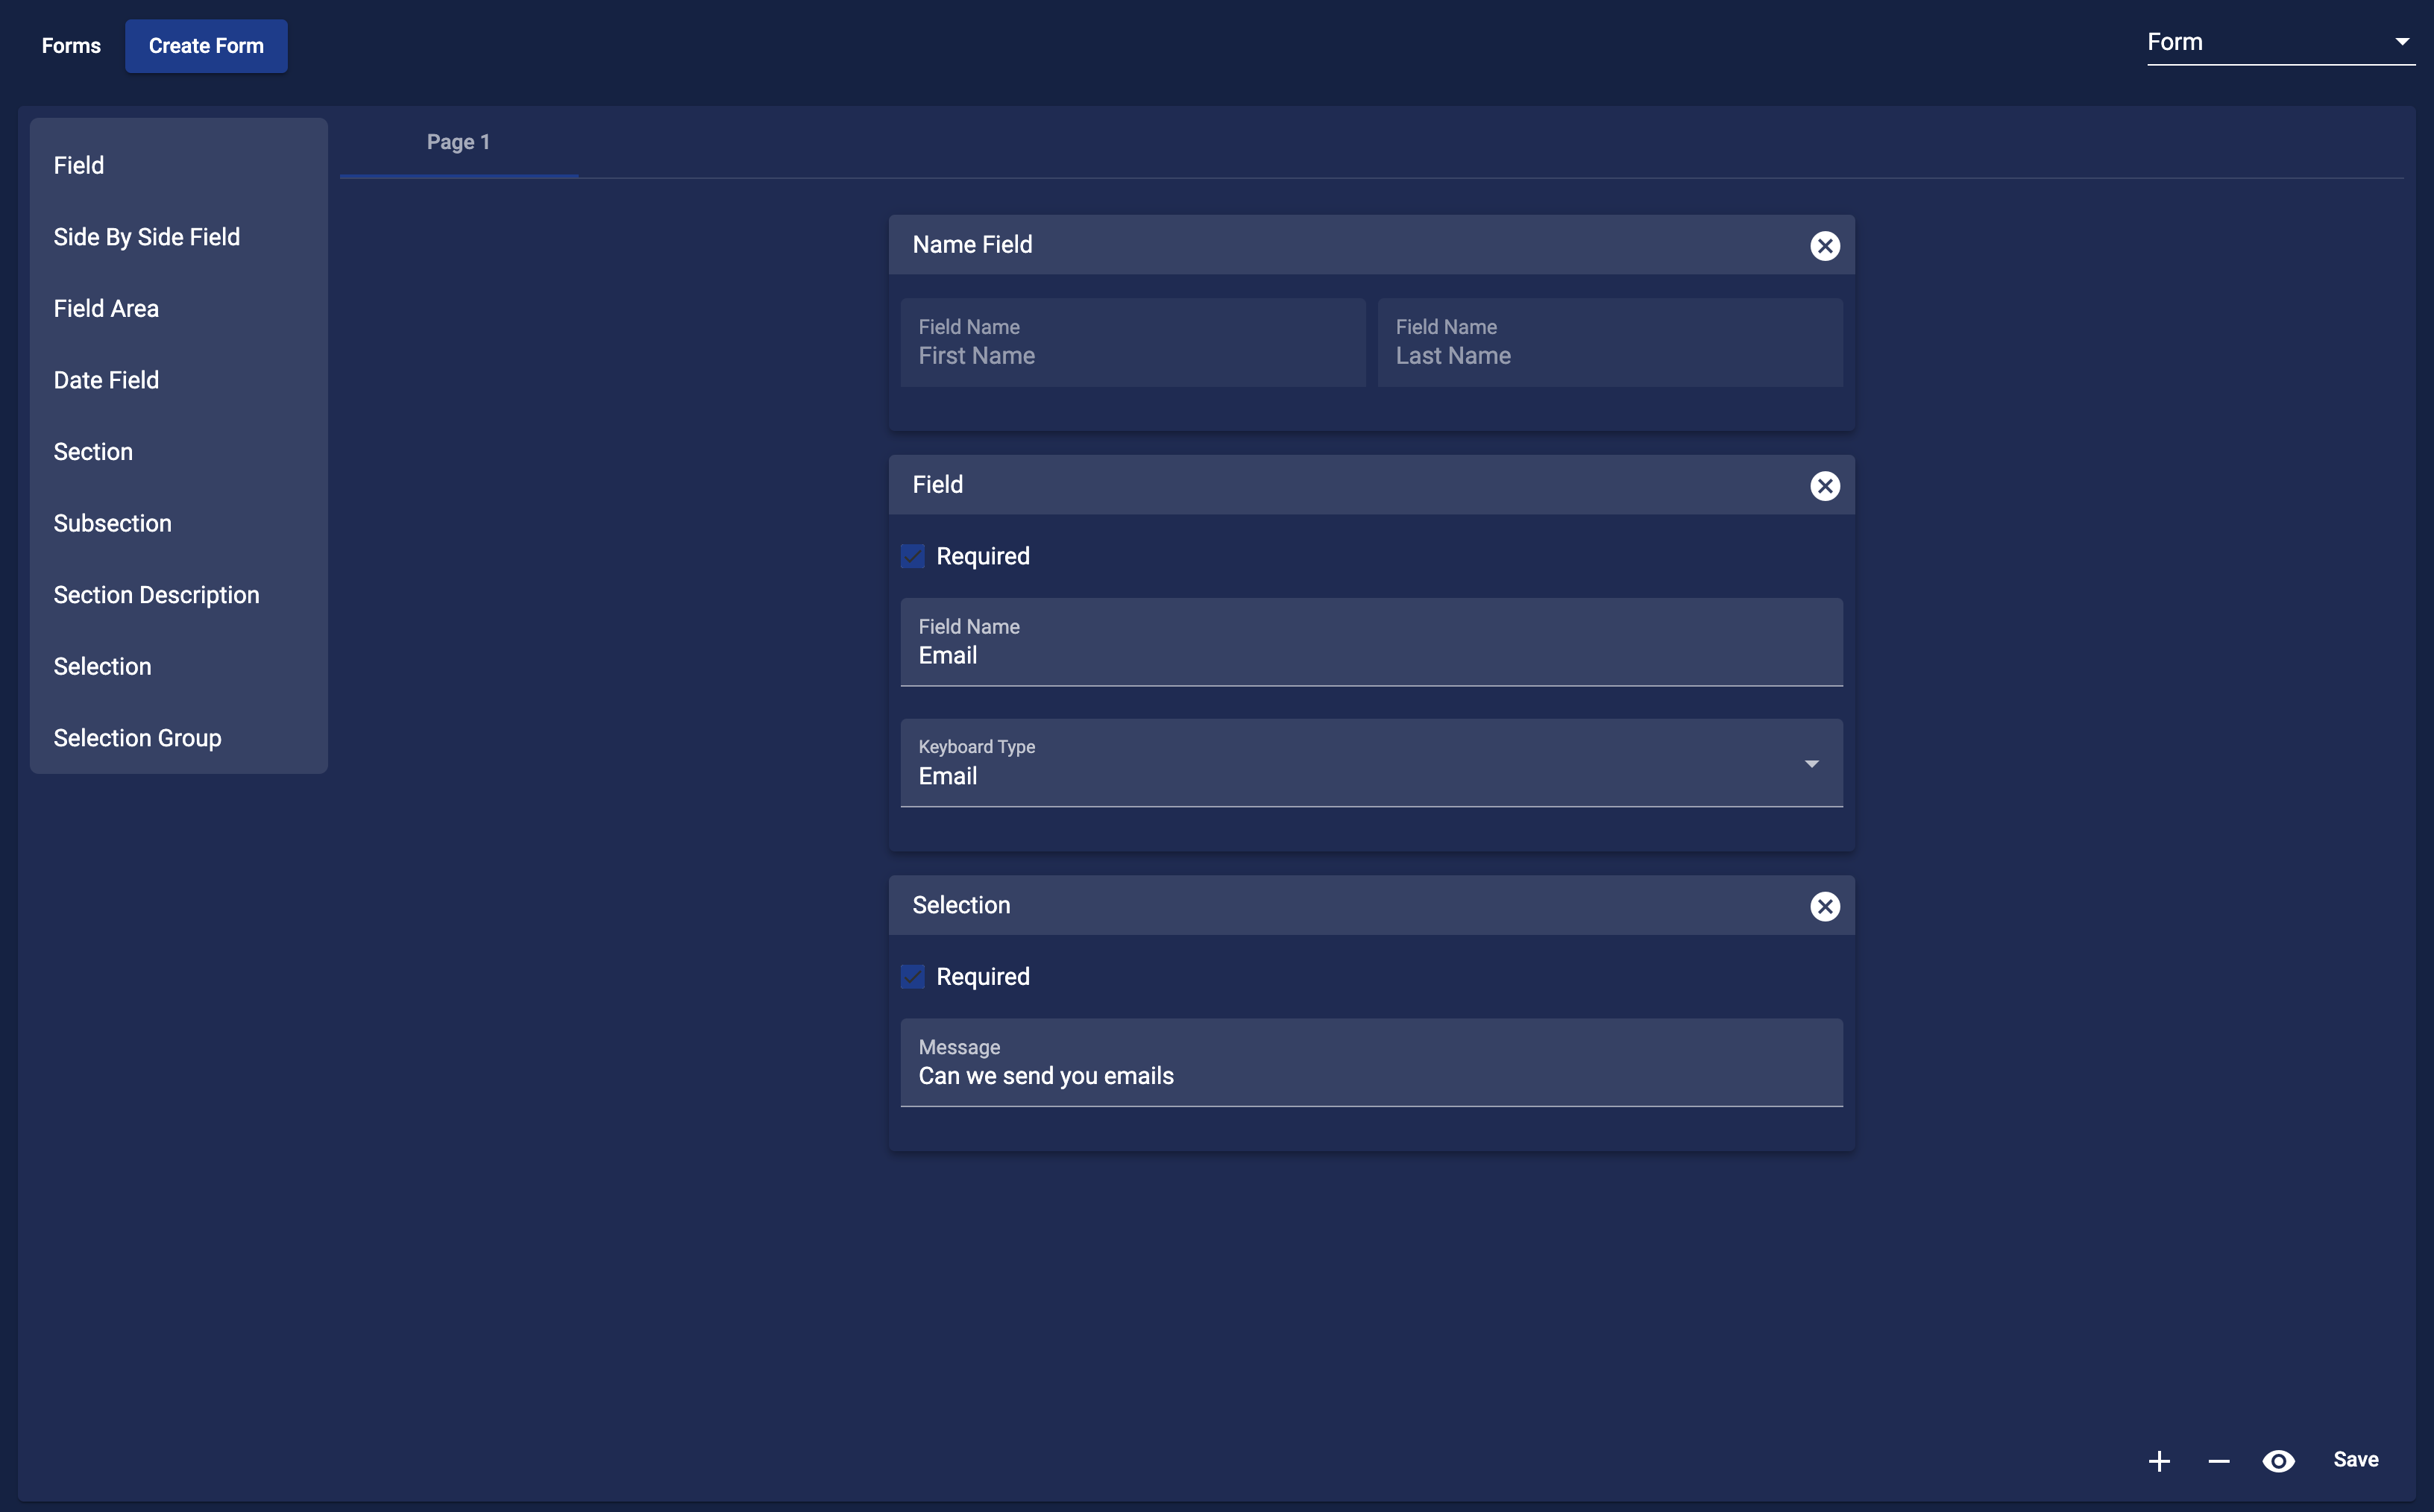
Crafting Your Form
With a grasp of form components, let's delve into the creation process:
- Start with Sections: If your form demands comprehensive details, begin by adding a "Section" or "Section Description" on the first page. Fill in the title and description (if needed).
- Add Fields: Drag the required fields onto your page, specify their names, and set the appropriate "Keyboard Type".
- Pages & Arrangement: Incorporate more pages as needed and use section titles for clarity. You can also rearrange or delete fields as necessary.
- Preview & Save: Periodically check your form's appearance using the view icon and remember to save your progress.